The staff at the Deer Creek & Susquehanna Railroad are excitedly getting ready to participate in this year’s NMRA Mid-East Region Convention from October 21 to October 24. Scott Wooddell will be conducting a clinic on Friday on JMRI Operations Pro basic setup and operations. On Sunday, the DC&S will be hosting an operating session in the morning and then be open for layout tours in the afternoon. Other members of HARM, Ken Poznaniak and Bill Freeland will also have their layouts open on Sunday for tours. Even amidst the pandemic, this convention promises to be spectacular. For more information about the convention and reserve your spot, go to https://mtclarejct.com . See you there.
A New Project: MPA #81
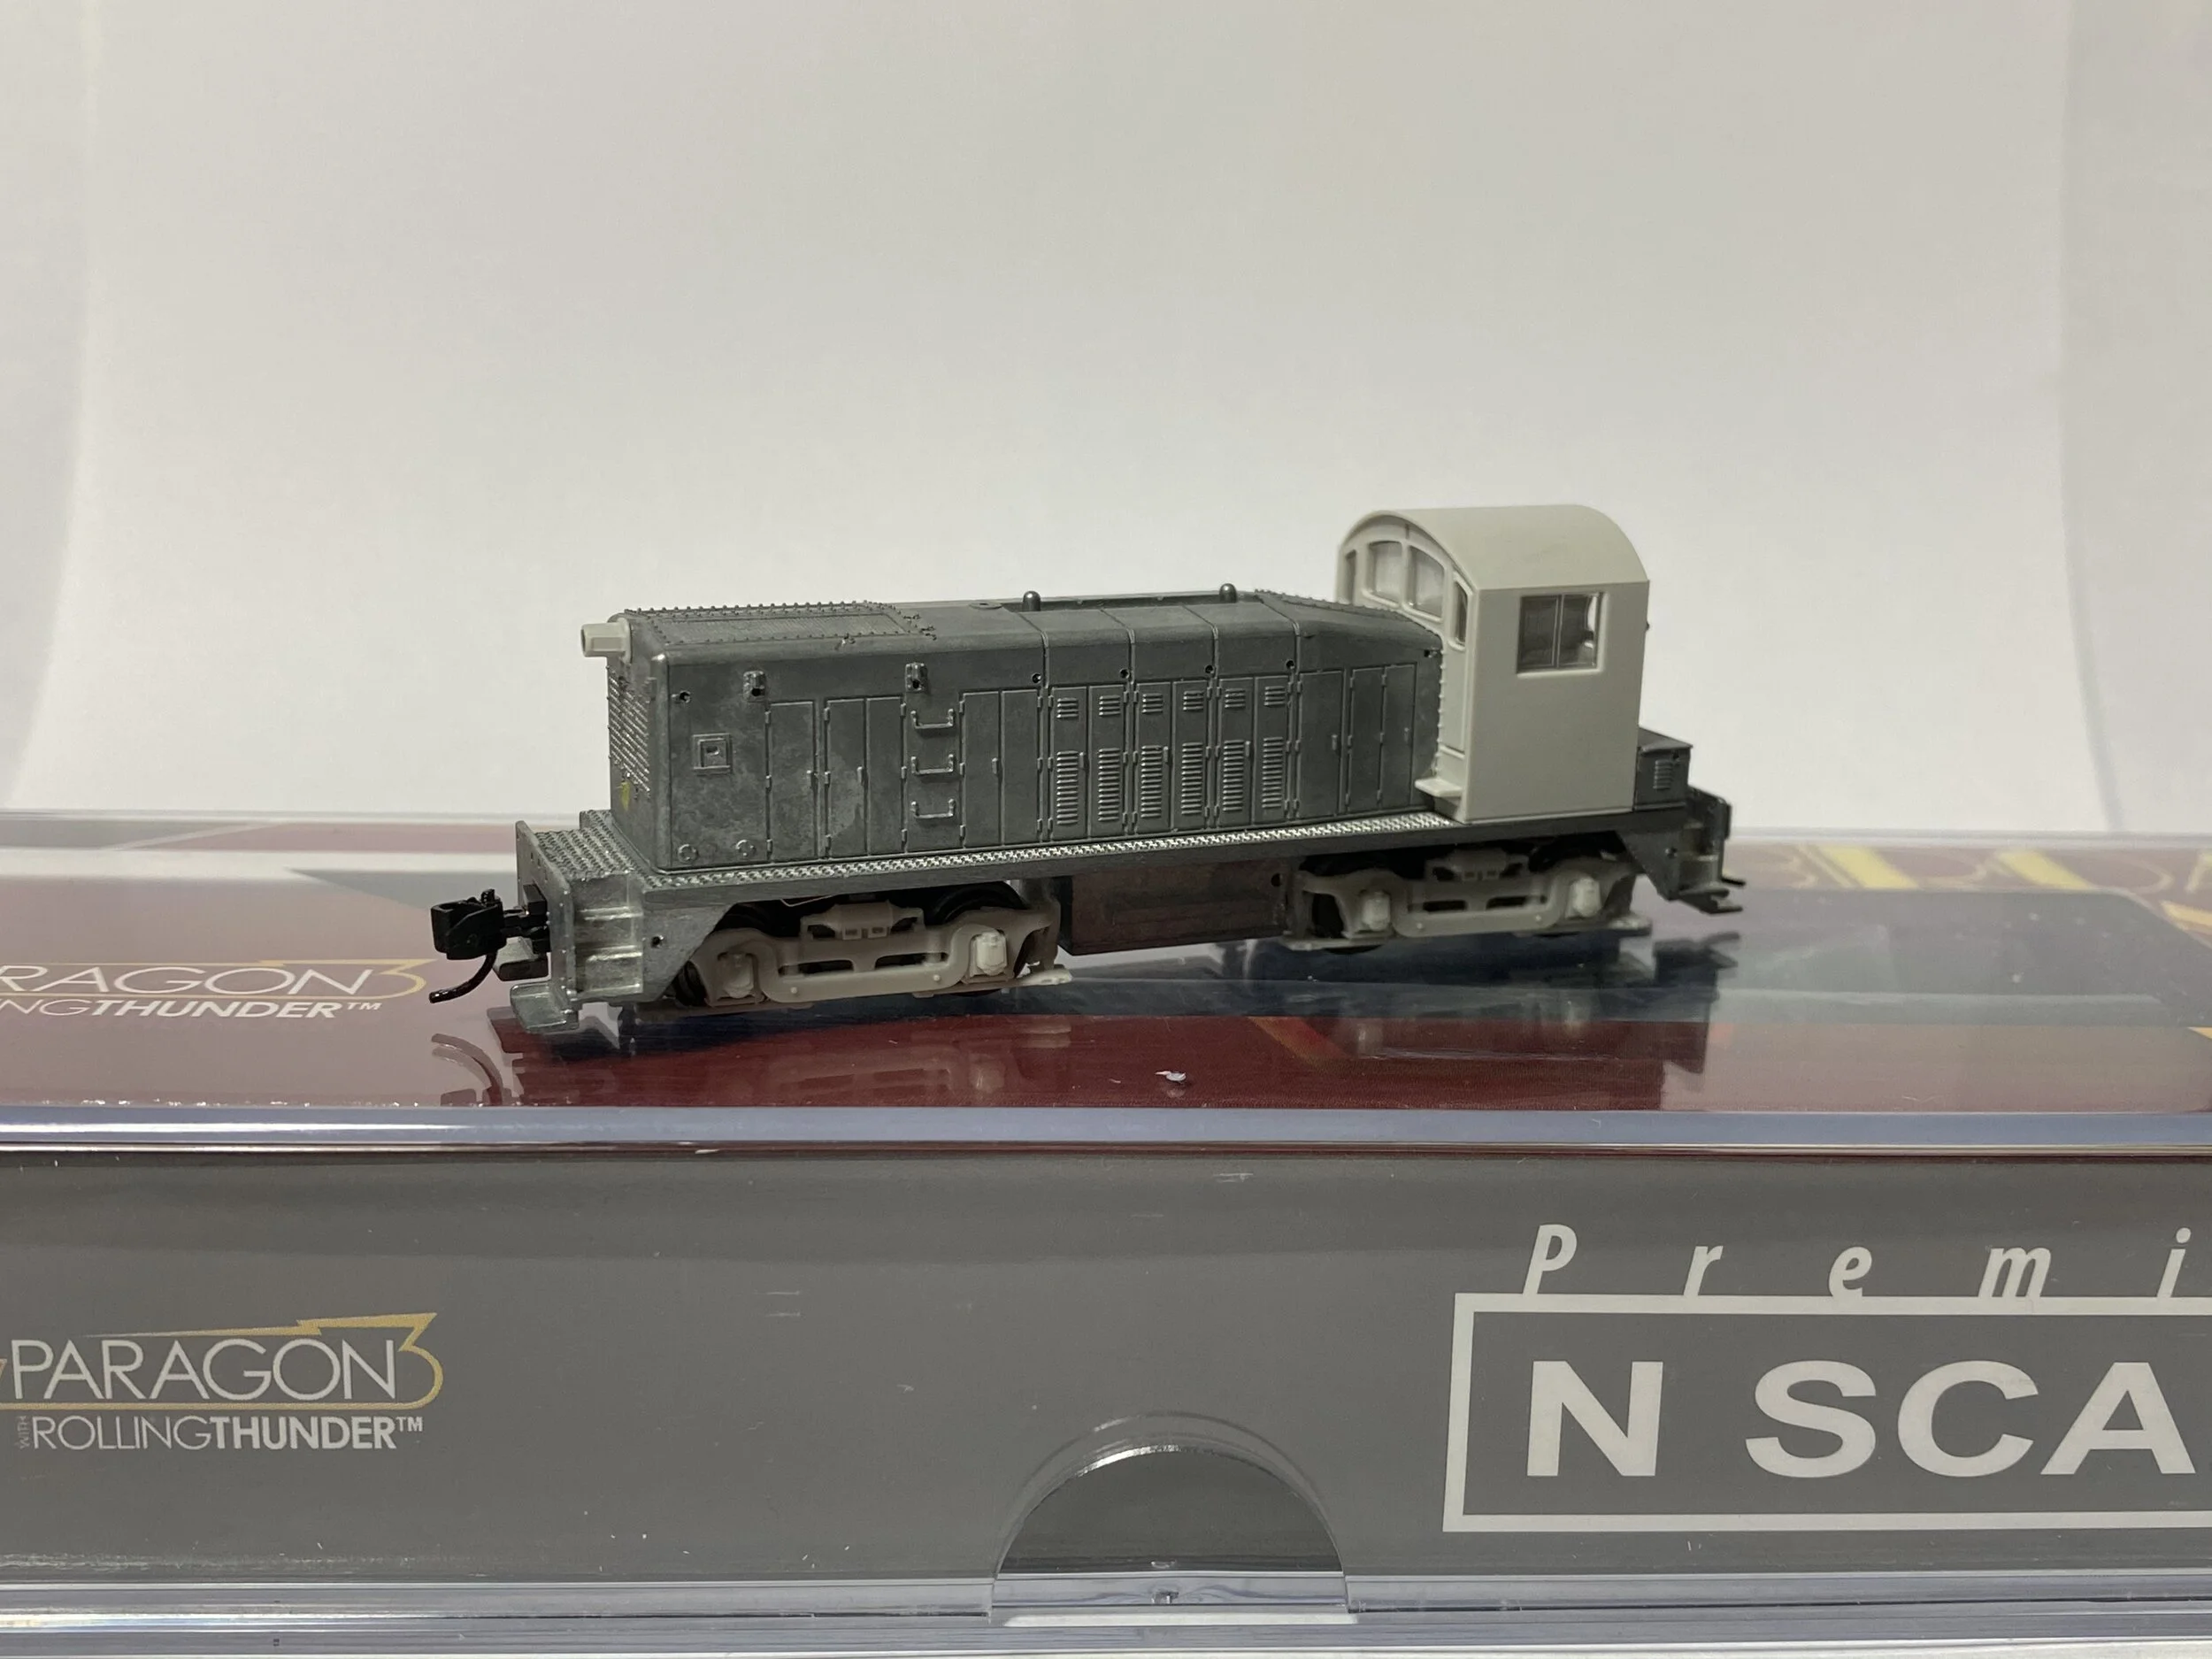
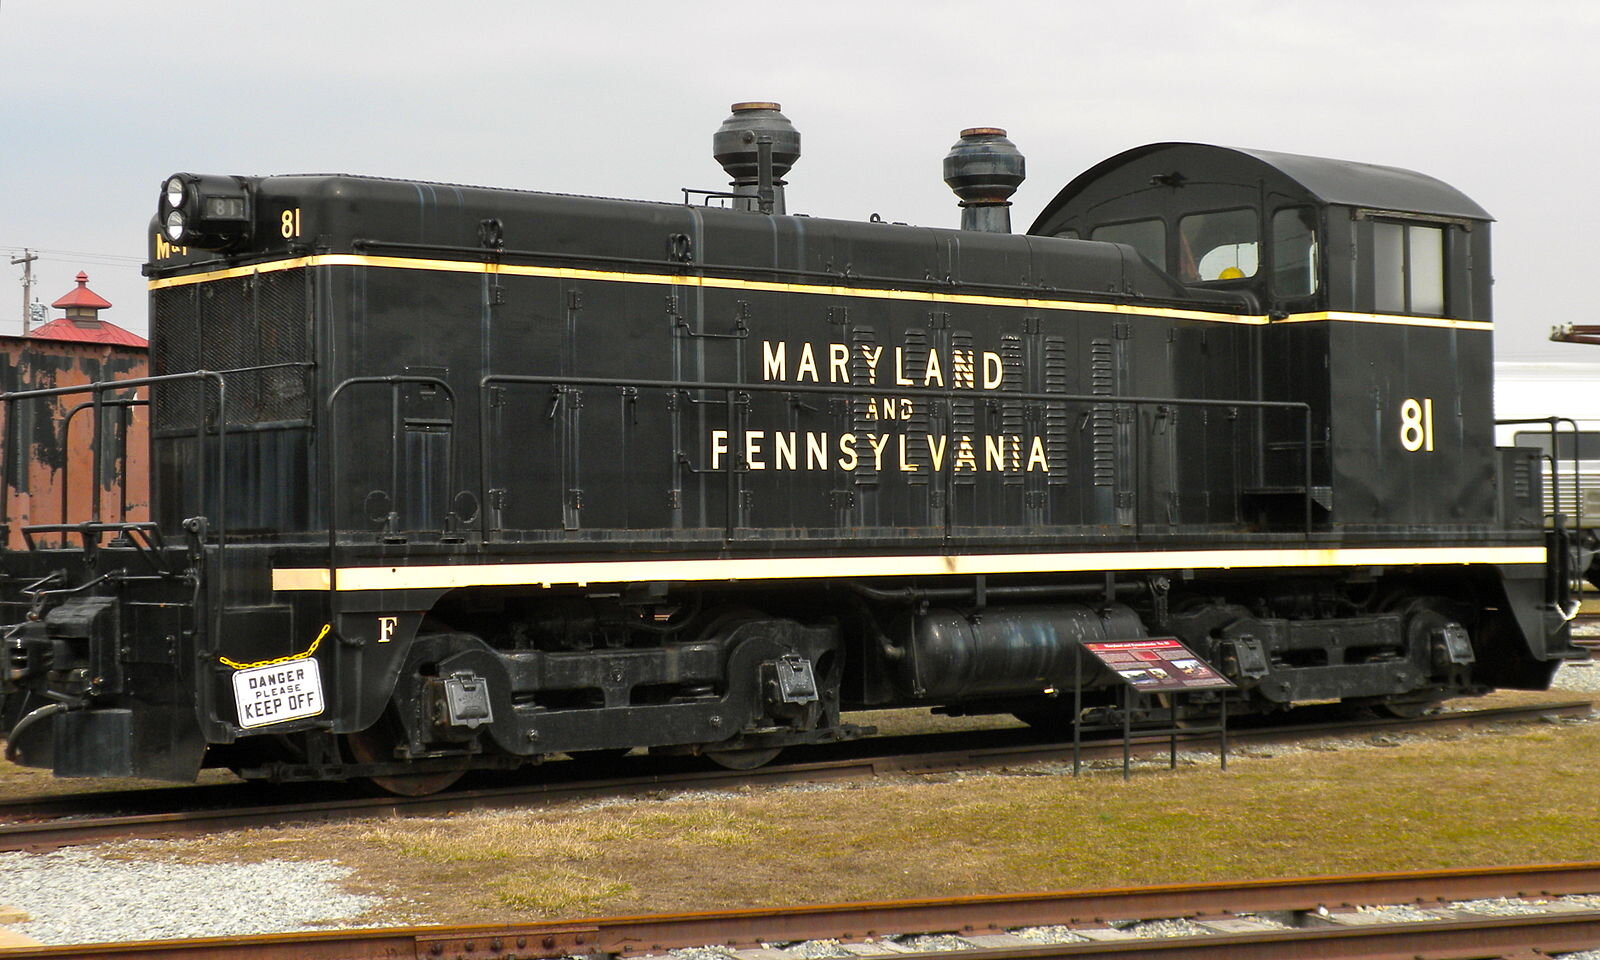
Recently, Broadway Limited Imports released a new N-scale model of an NW2 locomotive with DCC and sound. After purchasing one in PRR livery, I was very happy with the performance of the small switcher. Since the Maryland & Pennsylvania Railroad is my favorite road and the basis for my home layout, I thought, why not attempt to re-create one of their diesel locomotives in N-scale. With the ability to airbrush and print my own decals in any color on my laser printer, this project is starting to take shape. So, I ordered an undecorated model from Factory Direct Trains when they had one of their sales. The model was delivered today. I know the model will not be perfect, but I am not really the “rivet-counter” type anyway. Close enough is good enough. However, I do want to try to reproduce the round smoke stacks with what I think are spherical spark arrestors on top. Any suggestions for this would be greatly appreciated. So, let’s get off the computer and down to the work bench and make a plan for this project. I will keep you posted on the progress.
Much Anticipated New Rolling Stock
When these 36’ Old-time box cars were announced by Athearn N-scale back in May of 2017, I knew I would have to buy some. I own several other items from their inventory, both before and after they acquired Roundhouse, and have been pleased with their quality. Since I model a branch-line of the Maryland & Pennsylvania railroad, the M&PA cars were a natural. When I finally saw them in stock at modeltrainstuff.com, I ordered them and waited for them to arrive. The wait was well worth it. The completely assembled models are highly detailed with molded on a separately applied details, such as grab irons, brake wheels, and a roof walk. Even though the doors are not moveable, the underbody has good details, including truss rods with turnbuckles. Printing on the cars is clear and crisp. Athearn’s description states that the cars include truck mounted couplers. But much to my pleasant surprise, they are body-mounted and easily comparable with Micro-Trains knuckle couplers. Wheel sets are low-profile metal and roll freely and smoothly on Atlas code 55 track and turnouts. The trucks mount to the body with small screws, which makes them easy to adjust. Lastly, the car is weighted nicely, not too light and not too heavy. Overall, I am very pleasantly surprised with these cars, even though they are slightly outside of my modeling era. Oh well, I guess I will need to weather them heavily and not allow them to be used in interchange service. I can’t wait to see more offerings like this from Athearn.
Naval Gun Load and Pennsylvania F22 Flatcar Kits
Back in early April, 2018, The N-Scale Architect made a post on Facebook and other social media sites looking for three candidates to build their 'Naval Gun Load and Pennsylvania F22 Flatcar' kits and provide their unbiased feedback on building the kits. They would provide the kits for free and gave a timeline to post feedback. I thought that I would throw my name into the ring, and low and behold, was selected as a participant. Shortly after being notified, I received the kit in the mail with a nice letter from the company's owner.
Over the next several weeks, between work, family, and personal obligations, I began work on the kits. The first task was to open and inspect the parts and instructions. All of the pieces were in great condition and had some excellent detail. The instructions were thorough and complete, and included many fine diagrams and photographs. Most of the parts are 3-D printed through Shapeways (I assume) and needed to be cleaned first. I have dabbled in some 3-D printing of my own and have found Goo Gone followed by a mild dish detergent and a thorough rinsing to be more than adequate for this task. After air drying for several days, the parts were ready for a coat of primer. I just used a regular spray can of gray primer and found that I liked this color for the main portions of the gun barrel. Following the primer, came some color coats for the gun barrel supports and the flat cars. I used an airbrush for this task with some Badger Model Flex paints. Assembly of parts was next, starting with the gun load. All parts went together easily without any kind of sanding. The wire rods on the gun load were a little tricky and I wish that I had painted the brass before assembly. Fine details on the flat car such as the stirrups and coupler levers were somewhat of a challenge and required a bit of patience. After painting the trucks, adding the axles, and installing them on the cars, I noticed that some of the stirrups were a bit too long and interfered with the movement of the trucks. Decals were next; wow are they small! Again, taking your time can really pay off. Since there were three flat cars, I would apply the same decal to each of the cars before moving onto the next decal. After installing the brake wheels, lightly weathering, the kits were completed and ready for a run around the layout. My minimum radius is 15" with Atlas code 55 track and turnouts. The load made it around my layout with no trouble whatsoever.
Review
Here are my thoughts about this kit: there is a lot of bang for the buck in this kit, being that it is really four kits in one, three F22 flat cars and the gun barrel load. Seeing that I was building multiple items at once, it was nice to be able to bounce back and forth between items while paint or glue dried. All of the 3D printed parts have excellent detail and hold up well to handling. Paint goes on smoothly and glue adheres properly if the material is cleaned properly. The gun barrel load assembles easily and looks quite good. While the flat cars are weighted sufficiently and there is not really much assembly, the detail parts and decals on the flat cars are quite a challenge to get aligned properly. Instructions for this kit are more than sufficient, but some of the detail assembly is definitely not for the faint of heart.
Conclusion
I have been an N-scale modeler for almost 40 years and have built many structure kits, from plastic models, to wood craftsman kits, to kit bashing and scratch building. I have only assembled a few rolling stock kits which include an American Model Builders caboose and an old Roundhouse caboose. I am NOT an armchair or display case modeler. Whatever I am going to spend a significant amount of time building, painting and detailing must have a place on my layout. This kit from the N-Scale Architect will definitely have a place on my layout as an occasional "extra" in my operating sessions.
Lastly, I would like to thank the folks at the N-Scale Architect for the opportunity to share my modeling skills and thoughts about their product. I most certainly will continue to purchase the products that they produce as they fit into the scheme of my layout,
Decals
Since I model a short line railroad that never really existed, it was necessary to create my own herald and custom lettering. When I started on this adventure 20+ years ago, my model railroad mentor directed me toward dry transfers from Greg Komar (no longer in business). Those worked quite well for me to do my first custom locomotives, box cars, passenger cars, and cabooses. But now that my fleet has grown and now includes many locomotives that were not even on the market then, I knew I had to go into decals. First off, when I purchase a new piece of equipment, I either go with something undecorated or a very basic color that I can alter with minimal work (black works nicely). I certainly did not create any elaborate paint schemes for my basic railroad. When starting to shop around for a supplier of custom decals, the first company I came across and was recommended was Rail Graphics. But with them closing down operation at the end of 2017, I eliminated that supplier. Then I came across Circus City Decals & Graphics on someone's Facebook page. They were offering a special of $20 for an 8.5" x 11" sheet of decals that were text only (normally $40). So I set out on Microsoft Word and created a page of my road name in various formats for different purposes; locomotives, box cars, passenger equipment, etc. I also made a page of just potential locomotive & rolling stock numbers in a couple of different sizes. It can be a pain to try to cut and align individual numbers from a decal sheet. I contacted the company about how to submit the file and was promptly responded to by Matthew Welke with a proof sheet before printing began. In less than a week I had the decals in my hand ready to be applied. Following their directions, I applied the decals with a bit of Micro Scale's Micro Set and Micro Sol, allowing the decals to dry completelty between steps. The decals are very thin and require some care when applying, but the results are outstanding. Even before applying a dull-coat to the model, you can hardly even see the decal film. Now that I am this pleased with Circus City's work, it may be time to have my herald printed out on some decals.


